Recently one of our readers asked about adding a mortgage calculator in WordPress. A mortgage calculator is a useful tool for real estate websites because it allows visitors to see if they can afford the property they’re looking at. In this article, we will show you how to easily add a mortgage calculator in WordPress.
What is a Mortgage Calculator?
A mortgage calculator is an automated tool that allows you to get estimates for your mortgage payment, with interest rate and amortization period. It allows users to quickly calculate property-related costs on your website.
Who Needs a Mortgage Calculator on their Website?
A mortgage calculator is perfect for real-estate websites that showcase IDX based property listings.
A mortgage calculator allows users to easily calculate the mortgage value of the property, so they can decide if it is within their budget or not.
That being said, let’s take a look on how to easily add a mortgage calculator in WordPress.
Adding a Mortgage Calculator in WordPress
First thing you need to do is to install and activate the Responsive Mortgage Calculator plugin. For more details, see our step by step guide on how to install a WordPress plugin.
Upon activation, you need to visit Settings » Resp Mortgage Calculator page to configure the settings of your mortgage calculator.
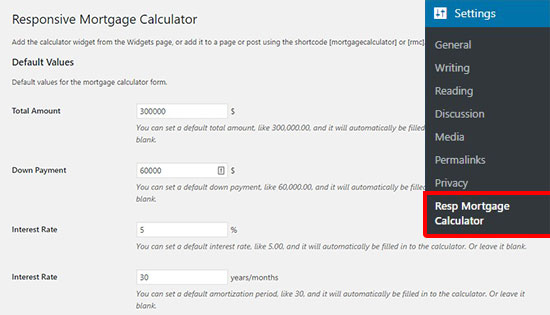
On this page, you can start with adding the default values to display in the mortgage calculator fields that’ll help users understand the calculator’s functionality. You can also leave these fields blank, so the users can enter their own values to calculate the cost of a property.
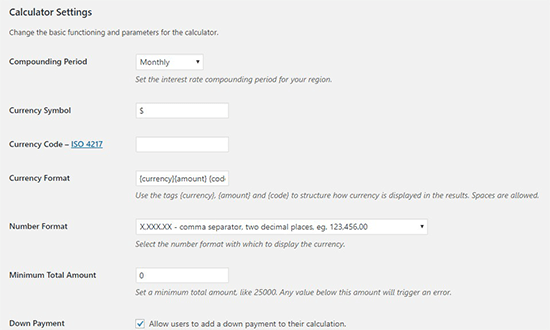
After that, you need to scroll down to the Calculator Settings section where you can change the basic functionalities of your mortgage calculator. Few of these settings include interest rate periods, currency symbol, currency code, formats, enabling down payment feature, and more.
Next, you can scroll down to manage the payment period settings. These settings allow users to calculate the down payments on periodical basis (annual, semi-annual, quarterly, monthly, etc).
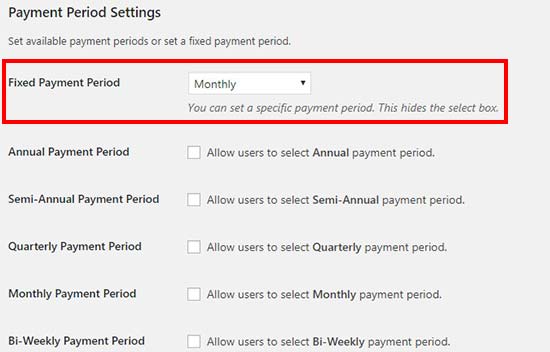
You can also set a fixed payment period for the specific property calculations, and it will hide other payment period options.
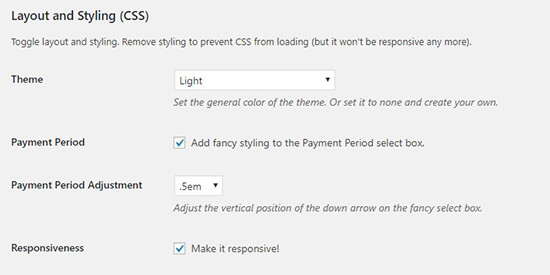
After the payment settings, you can scroll down to the layout and styling options. From here, you can select a theme for your mortgage calculator, add styling, enable/disable responsive setting, and more.
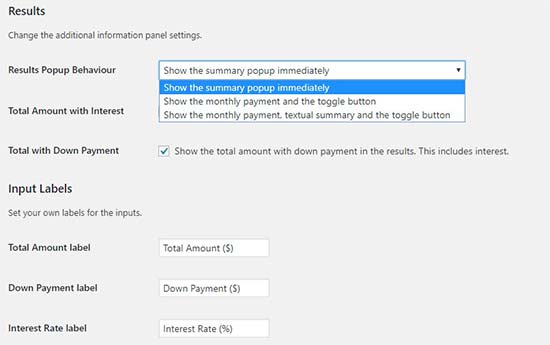
After that, you can manage how you want to display the results and add labels for the calculator fields.
You can also create your own custom style settings to change the display of your mortgage calculator.
Don’t forget to click on the Save Changes button to properly store these settings.
Upon saving, you’ll see a shortcode on the top of this page. You can copy / paste this shortcode on any post / page where you want to add the mortgage calculator.

If you want to add a mortgage calculator in the sidebar of your website, then go to Appearance » Widgets page and drag the Responsive Mortgage Calculator widget to your sidebar widget area.
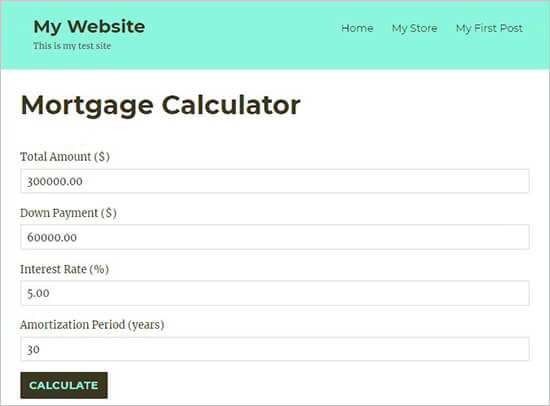
After that, you can visit your website to see the mortgage calculator in action.
We hope this article helped you learn how to add a mortgage calculator in WordPress. You may also want to see our list of the best WordPress real estate plugins to add more flexible features on your real estate website.
If you liked this article, then please subscribe to our YouTube Channel for WordPress video tutorials. You can also find us on Twitter and Facebook.
The post How to Add a Mortgage Calculator in WordPress (Step by Step) appeared first on WPBeginner.
from WPBeginner https://ift.tt/2MCJhTZ

No comments:
Post a Comment